The Ultimate Guide to GitHub CLI
CLI stands for the command line interface. Tools that do not have graphical user interface and run on command line interface are called CLI tools. Companies make CLI tool for easier and faster access to features and functionality to improve productivity. Today, most widely used products such as AWS, Azure, Shopify, IBM Cloud, etc have their own CLI tools.
Recently, Microsoft owned GitHub has introduced a new CLI tool called GitHub CLI to do interactions with repositories in more flawless ways. I have used the word “new” because there's been a tool called hubfor years which is GitHub's unofficial CLI tool. So many folks will wonder why built a new tool when there is already one, what are its advantages, what it does, how to use it? Don't worry, I have been using GitHub CLI since its release and now, here I'm with this Ultimate Guide to GitHub CLI tools to improve your productivity with GitHub CLI tool. I will try to cover every edge of this new CLI tool in this article, but we start I would recommend you check The Ultimate Git Cheat Sheet for better understanding of GIT.

Difference between 'hub' and 'gh'
This new tool is also known as gh and it has a more simplified structure and more options to use which makes it an even better product.
hub works as a proxy to the GitHub whereas gh is a self-sufficient tool for GitHub.
Getting started with GitHub CLI
Downloadable binaries and MSI for gh can be found on GitHub CLI release page or follow the following instructions to install and getting started with it
Install gh / GitHub CLI
Windows
Apart from the downloadable MSI gh is also available via WinGet, scoop, Chocolatey.
WinGet
winget install ghscoop
scoop bucket add github-gh https://github.com/cli/scoop-gh.git
scoop install gh
Chocolatey
choco install ghLinux
Apart from the downloadable binaries gh is also available via Homebrew, below is the distro-specific installation guide
Debian, Ubuntu Linux (apt)
sudo apt-key adv --keyserver keyserver.ubuntu.com --recv-key C99B11DEB97541F0
sudo apt-add-repository https://cli.github.com/packages
sudo apt update
sudo apt install gh
Fedora, CentOS, Red Hat Enterprise Linux (dnf)
sudo dnf config-manager --add-repo https://cli.github.com/packages/rpm/gh-cli.repo
sudo dnf install gh
openSUSE/SUSE Linux (zypper)
sudo zypper addrepo https://cli.github.com/packages/rpm/gh-cli.repo
sudo zypper ref
sudo zypper install gh
macOS
Apart from the downloadable binaries gh is available via Homebrew, MacPorts
Homebrew
brew install ghMacPorts
sudo port install ghKnowing the 'gh' help commands
We can simply use the help command to get familiar with different commands.
gh help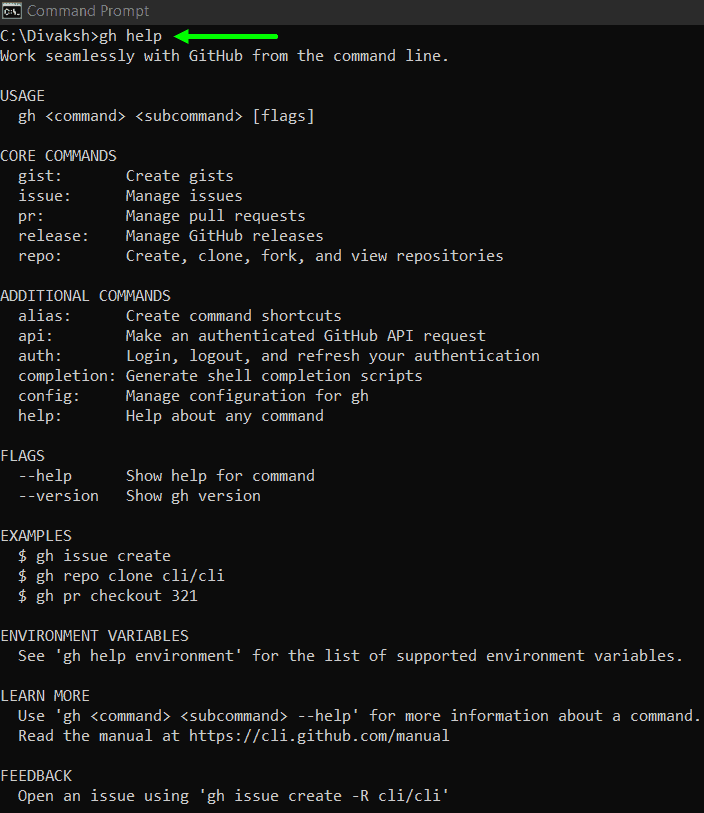
Moreover, we can get help for different command combinations like
gh issue help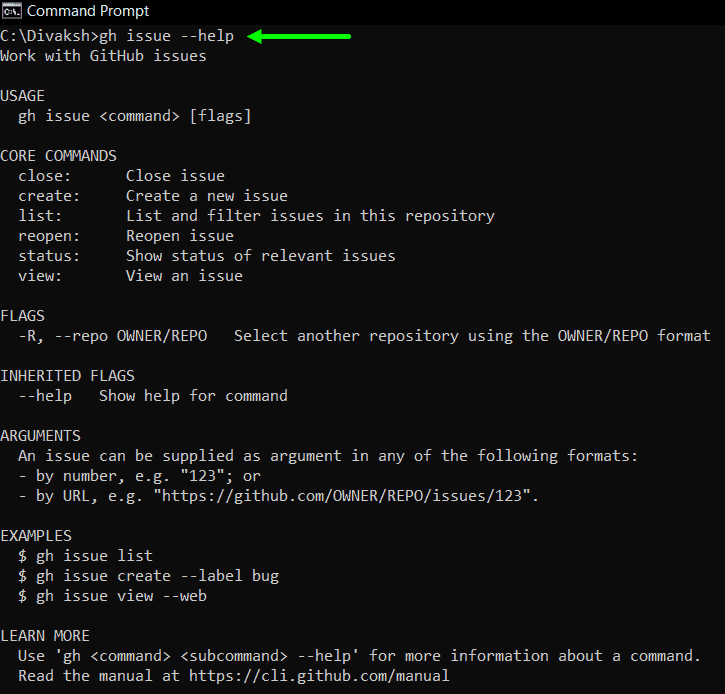
Authenticate Your GitHub Account via CLI
To access a GitHub repository through your CLI, you must authenticate your GitHub account with help of the following command.
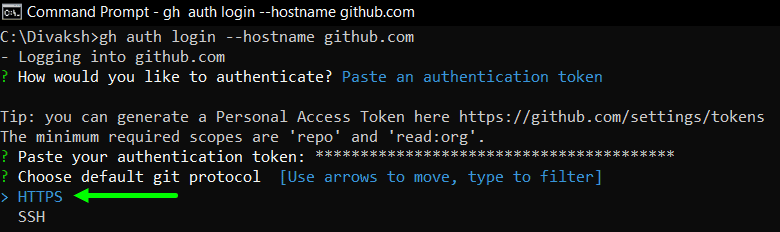
gh auth login --hostname github.comYou will see a screen like this

Here you will have two options
- Login with a web browser
- Paste an authentication token
Login with a Web Browser
When you opt for Login with a web browser
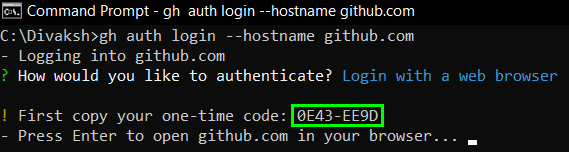
First, copy the highlighted code, this is the authentication code for your machine from which you are trying to access GitHub.
When you press the Enter key, this window will be opened in your browser:
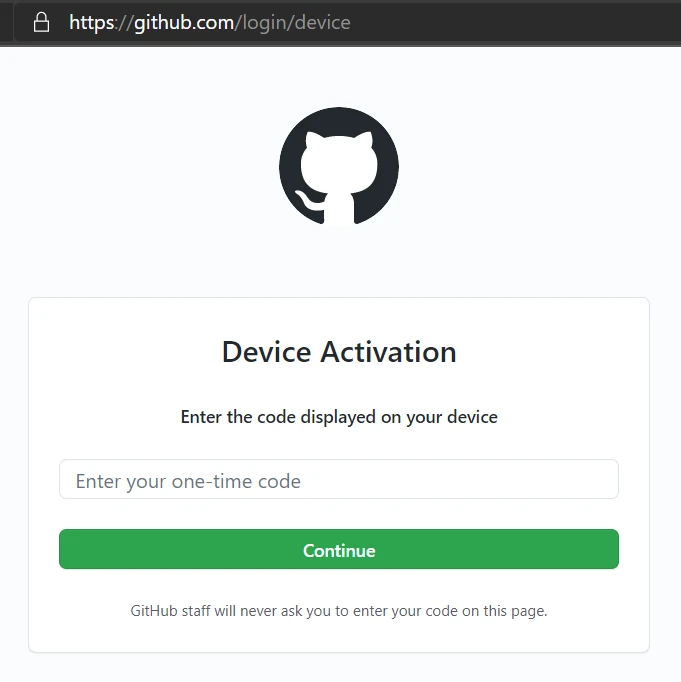
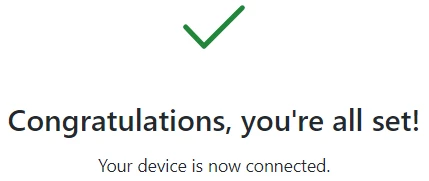
Here in the input box paste the code you have copied in the previous step. When you click on the continue button, in the next window, you will see
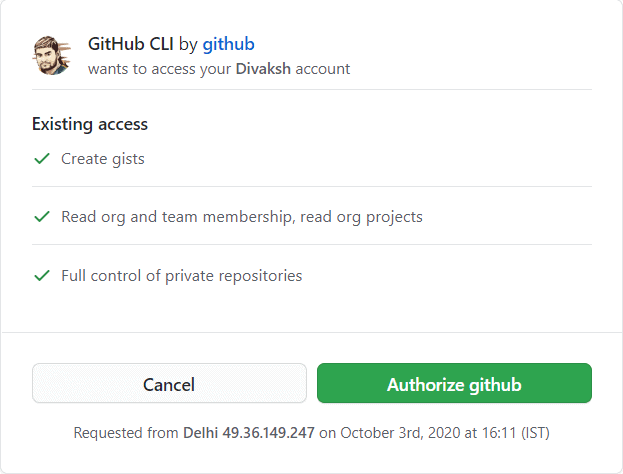
Now, Click on Authorize github and proceed. You will be asked for your GitHub password to complete the authorization process. Enter your password and proceed.
Now let's cover the other part where you would have chosen another option Paste an authentication code
Paste an Authentication Code
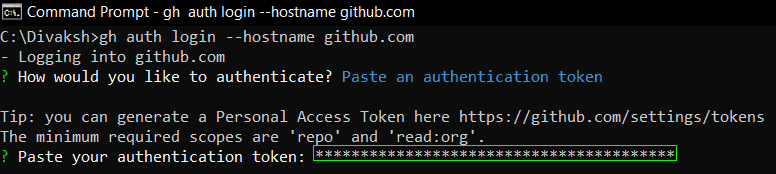
When we navigate to this option in the command line and press Enter, it will ask for an access token to your GitHub repository. If you are not aware of this, you can learn how to generate an access token for your repositories from the official GitHub documentation.
You need to copy the token from your repository and paste it into your command line like this.
One thing to remember here is that you must select the read scope in the scope selecting checklist of edit personal token window, see the following image for the reference
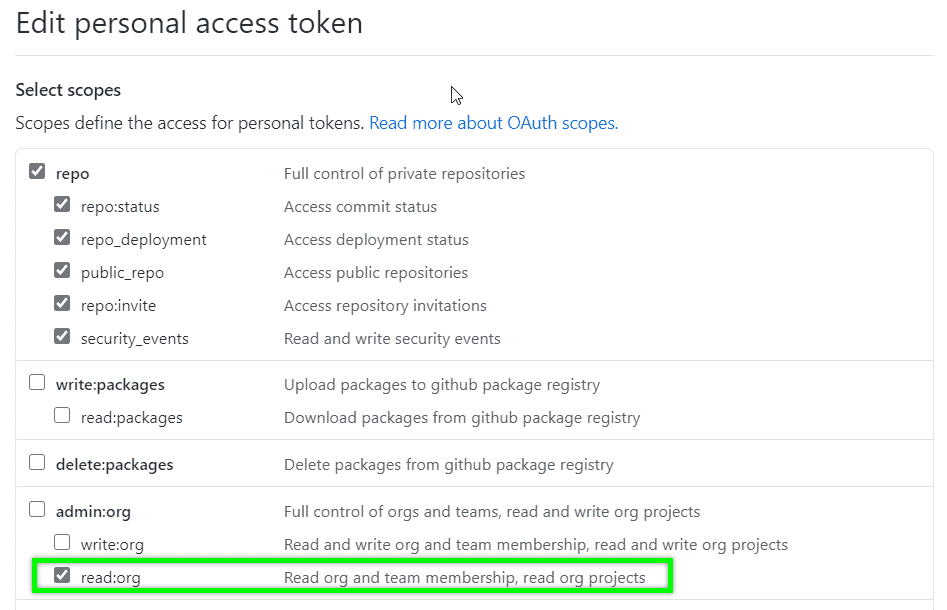
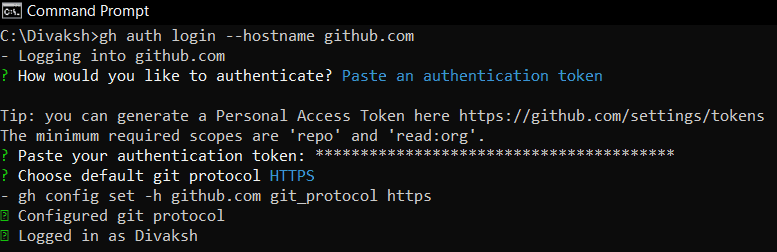
Now press Enter and choose the protocol form HTTPS and SSH.
Now, you have completed your authentication process via access token
Set default text editor
For setting a default editor, you can use the following command
gh config set editor <editor> By default, for windows it is set as Notepad.
Accessing Repos
You can do various operations on GitHub repositories with the help of GitHub CLI tool.
Cloning a Repository
For cloning a repository form GitHub, you can use the command.
gh repo clone <URL of the repository>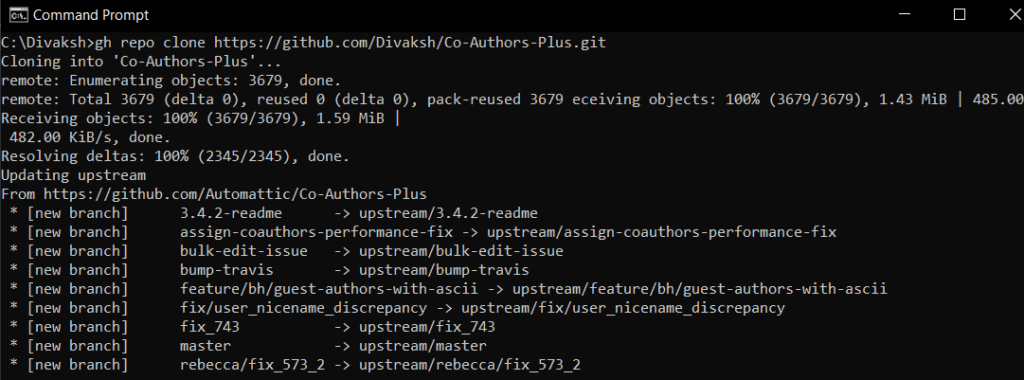
Creating a Repo
Creating a new repository can be done with the help of create command.
gh repo create <Name>You can use various flags for this process like this
gh repo create <Name> --<flag>Replace the <flag> with the following list of flags
| flag | discription |
|---|---|
| --description "write description" | You can provide description for your repository |
| --enable-issues | Will enable the issues in your repo |
| --private | Will make the repo private |
| --public | Will make the repo public |
Handling Issues
Creating an Issue
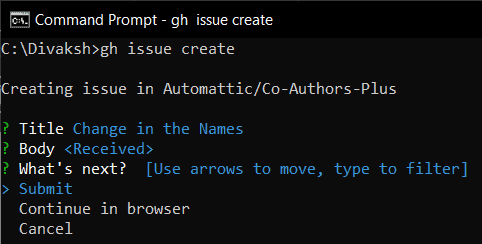
You can create and maintain issues on your repo through GitHub CLI tool. To create an issue simply use the command:
gh issue create It will ask you for the title of the issue

After entering the title, it will ask you to give the body of issue (brief description), it's your choice to provide or you can skip this part and proceed. Now you have the choice to submit it as it is or allow CLI to open the issue in your browser so that you can edit the details, or you can add the metadata.
Or you can do it all in one go, like if you want to generate an issue with a given title and body:
gh issue create --title "Change in Names" --body "Change all Destinations"To create an issue with a label:
gh issue create --label "enhancement"Generating an issue with assignee:
gh issue create --assignee George,JesicaWhen you finally submit an issue, GitHub CLI gives you the URL to the issue, at the end of which you can find the issue number.
Closing an Issue
You can close an issue by providing the issue number
gh issue close <issue number>or you can close it by providing the issue URL
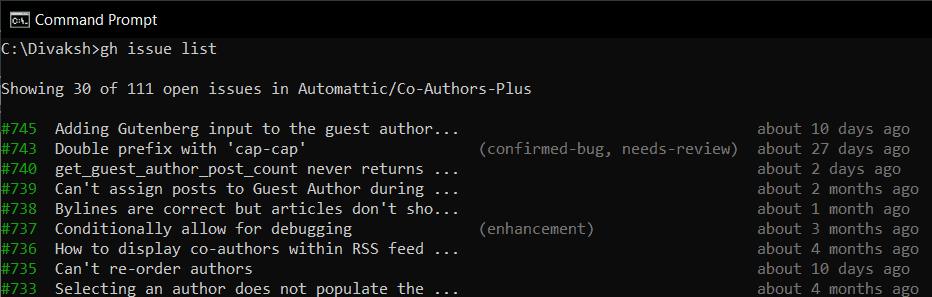
gh issue close <issue URL>Listing the Issues
You can list all your issues in the command line by using the command
gh issue listListing the issues can also be done by providing appropriate filters like
gh issue list <filters>Replace the <filters> with the following list of filters
| filter | discription |
|---|---|
| --label "enhancement" | Filters issues with the label |
| --milestone "Milestone title" | Filters issues with milestone title or number |
| --assignee "Luthor" | Filters issues with the assignee |
| --author "author name" | Filters issues with the author name |
Reopening the Issue
To reopen an issue, you just need to run the following command
gh issue reopen <issue number or issue URL>Getting the Status of the Issues
There is a command to get the status of the issues of your GitHub repo
gh issue statusView an Issue
To view details of an issue, you can try
gh issue view <issue number or issue URL>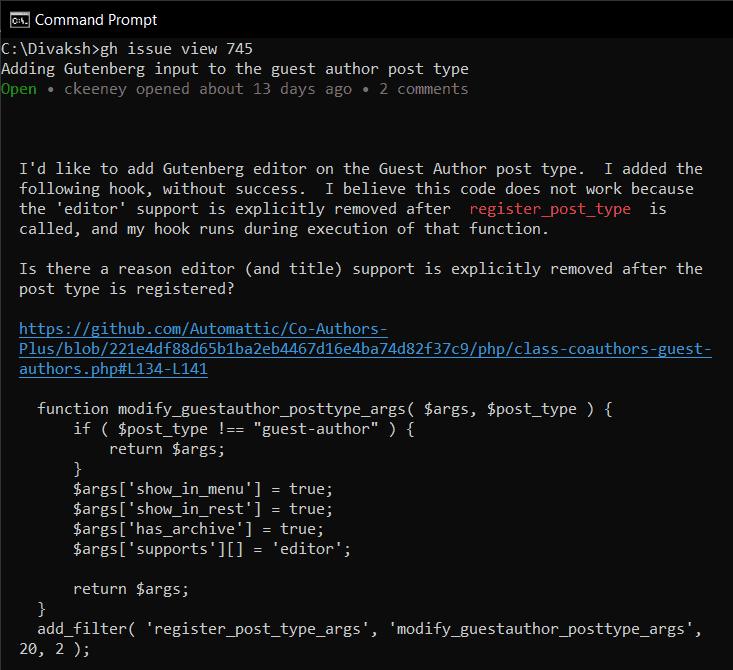
or if you wish to view the issue on GitHub from your browser, you can pass a flag '--web' like this
gh issue view --webThis will open the issue in your Browser.
Closing the Issue
Last but not the least, closing of an issue can be done through the following command
gh issue close <issue number or issue URL>Managing Pull Requests
Pull requests are easy to manage through GitHub CLI tool. Let's talk with commands.
Creating Pull Request
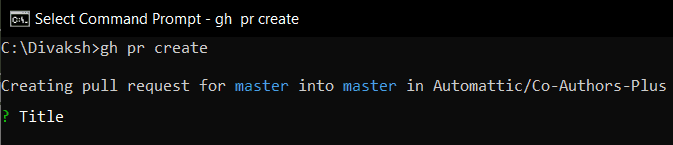
You can create a pull request with the command
gh pr createWhen you execute the above command, you will be asked for the title and body for the pull request.
If you don't want this to happen, you can use the flags '--title' and '--body' in the command like this
gh pr create --title "The bug is resolved" --body "Everything is working fine"You can pass many flags/options to this command like:
gh pr create <flags>Replace the <flags> with the following list of flags
| flag | discription |
|---|---|
| --project "Project Name" | Will add the pull request to the project by name. |
| --full | You will not be asked for title and body, commit info will be used. |
| --base <branch name> | Specifies the branch in which you want your code to be merged. |
Do Checkout
To do checkout to a pull request, you can use the command
gh pr checkout <pr number or URL or branch>Close a Pull Request
For closing a pull request, you just need to mention its number, URL, or branch in the command.
gh pr close <pr number or URL or branch>and if you want to delete the local and remote branch after the closing of pull request, you can use
gh pr close --delete-branchViewing the Changes in the Pull Request
To pin out the differences covered by the pull request, you can use the command.
gh pr diff <pr number or URL or branch>List out the Pull Requests
For listing and filtering out the pull requests from the repositories you can use the command.
gh pr listAnd you can use many filters also for listing like
gh pr list <filters>Replace the <filters> with the following list of filters
| filter | discription |
|---|---|
| --assignee "assignee name" | Will list out the pull requests by assignee name |
| --base <branch_name> | Will filter out by the base branch name |
| --label "label name" | Will filter out by label name |
| --limit <number> | Will limit the listing to the specified number. |
| --state <state> | Will filter out by state like closed, open, merged. |
Marking a Pull Request
You can mark a pull request for review with the help of the command
gh pr ready <pr number or URL or branch>Reopen a Pull Request
To reopening a pull request, you can simply use
gh pr reopen <pr number or URL or branch>Review a Pull Request
You can add a review to a pull request using the command
gh pr reopen <pr number or URL or branch>You can use different flags for reviewing the pull requests
| flag | discription |
|---|---|
| --approve | Will approve the pull request |
| --comment -b "remarkable" | Will leave a review commit |
| <pr number> | Will add the review for the specific pr |
Get the Status of Pull Request
To know the status of pull request you can use
gh pr statusView Details of Pull Request
You can view the details of pull requests by using the following command
gh pr view <pr number or URL or branch>Working with Gist
The gist is a service offered by GitHub, gist is a small and lightweight repository hosted on GitHub to share code snippets. The biggest advantage of gist is you don't need to download and install any tool to create a gist, add, modify, and delete files of a gist, all these can be done right into your browser, you can even code entire gist in the browser, but you can also do all this stuff easily with the help of GitHub CLI tool.
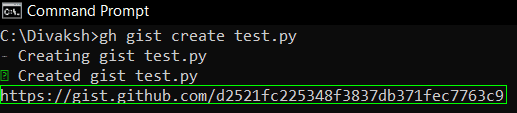
Creating a gist
For creating a gist, you can use
gh gist create <filename>When you run this command, it provides you the URL of the newly created gist.
By default, created gist will remain private, if you want to create a public gist
gh gist create --public <filename>For giving a description to your gist
gh gist create <filename> -d "Your Description"If you want to create a gist with multiple files
gh gist create <filename_1> <filename_2>Editing the Gist
You can edit, an already created gist by using the command
gh gist edit <gist id> or <gist url>Now in this command you can also pass an option where you can define the name of the file.
gh gist edit <gist id> or <gist url> -f <filename>Listing out the Gists
Listing operations can also be performed on gists by the following commands.
gh gist list [options]Now you can add some options in this command to do the listing operation more specifically like.
Limit the number of items to 10 in the list
gh gist list -L or --limit 10List only public gists
gh gist --publicList only secret gists
gh gist --secretView the Gist
You can view your gist by using the gist id or url in the command like this.
gh gist view <gist id> or <gist url>Moreover, there are some options provided to facilitate your view like
Display a specific file of the gist
-f or --filename <Name of the File>Open the gist in the browser
-w or --web